
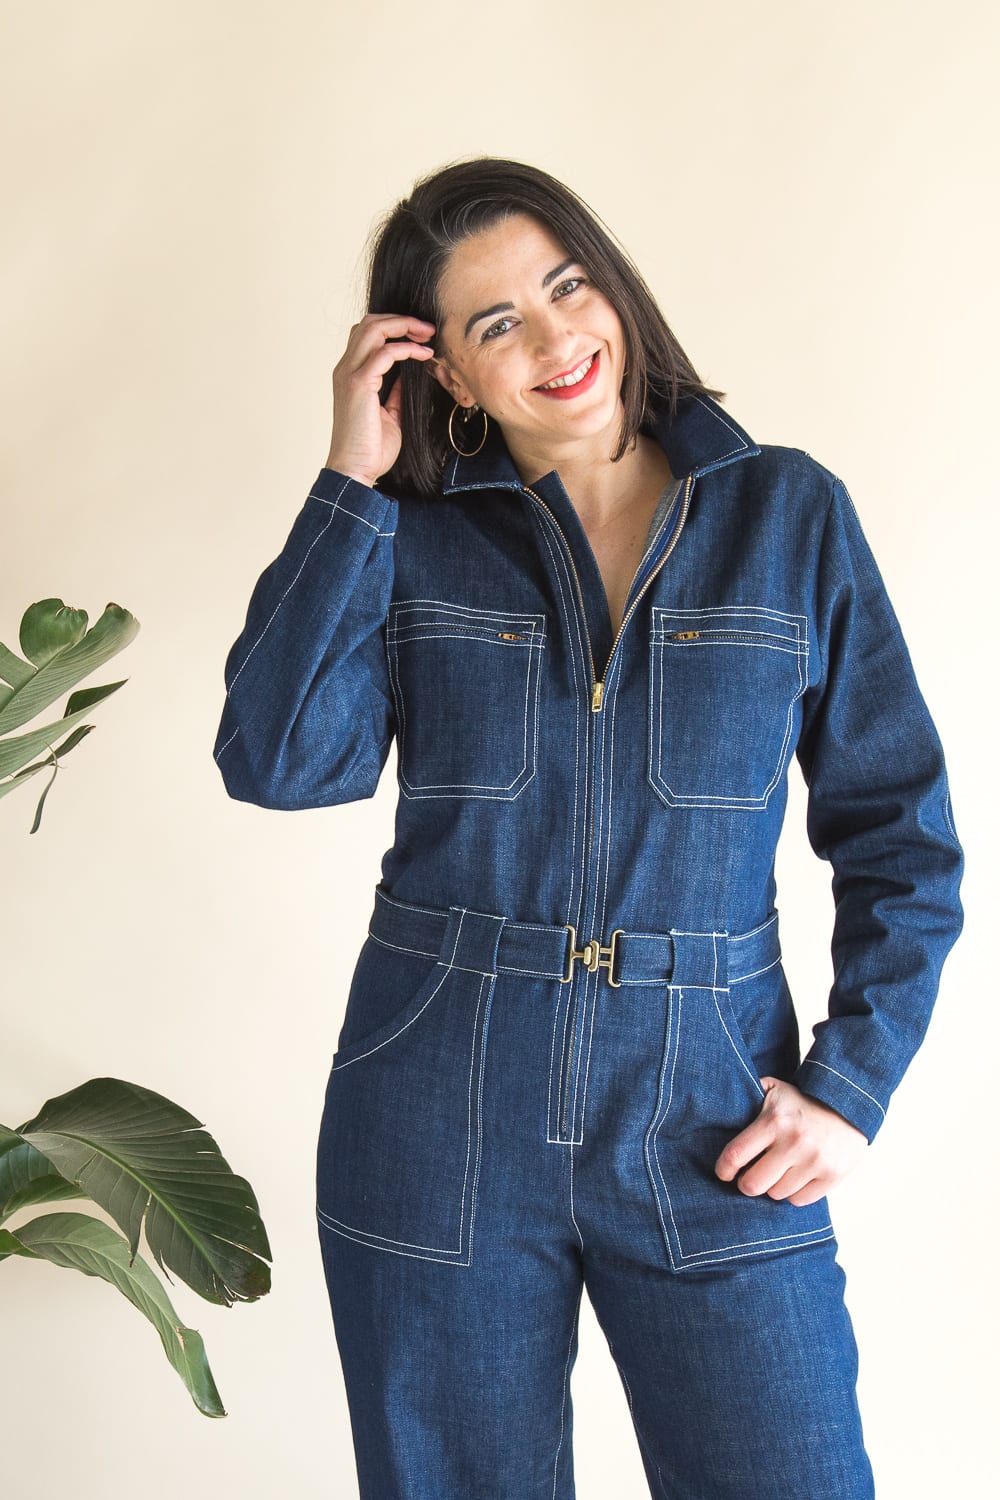
Hey y’all! Today we have a big meaty post on fitting the Blanca Flight Suit! This pattern has quite a few moving parts (it’s basically a shirt and pants in one) so depending on your needs, you may need to make a few changes to get it fitting just the way you want. We’ll be covering quite a bit in this post, including more detailed info on how we intend this baby to fit, so strap on your seat belts and let’s get started.
FIRST: PLEASE MAKE A MUSLIN
While we’re very happy with the fit straight out of the package, we HIGHLY recommend making a quick muslin before you get started. We’ve made our opinions on muslins clear here, but suffice it to say, as excited as you may be to jump into making your flight suit, taking a few hours to whip up a rudimentary test garment will ensure you are happy with the fit and aren’t wasting valuable fabric. The length through the body is the key thing you want to look at, and while we’ve provided a lot of finished garment measurements, nothing beats a muslin to ensure everything is sitting and hitting where you want. You don’t need to make the whole garment; I suggest cutting the legs into shorts and using the short sleeve (which you can cut a bit shorter if you want). This will let you assess the length of the bodice, crotch rise, placement of waistband, and width through shoulders, bust, waist and hip. You don’t even need to sew in the zipper – just clearly mark your center front lines (remember the seam allowance at center front is 3/4″) and try pinning it closed if you want to skip a step.
FIT DETAILS AND EASE
Since this garment has so many features, we added a handy guide in the instructions that explain how the garment is intended to fit. The bodice is meant to have a more relaxed fit, with comfortable ease through the upper body, a dropped shoulder and a slightly looser fitting waist. The waistband should hit about an inch below your natural waist, and fit slim through the hips. We’ve included markings on the pattern pieces for bust apex, waist and hip so when you’re making a muslin, you can see where those areas hit on you and adjust as needed.
That said, you can play around here. If you want a narrower shoulder or tighter waist, feel free to make adjustments to suit you; we intentionally designed the waist so that you can take it in even after the entire garment is assembled by simply taking in the side seam. One thing to keep in mind is the tendency of wovens to stretch out with wear. Twill, denim and canvas tend to stretch a lot, so if you find that it gets a bit baggy after a day of wear, take in those side seams! We include notes in the pattern about when to do a baste fit before finishing your seams.
We drafted this to be a bit long through the body; the crotch should sit about an inch or so below your pelvis and the back bodice is drafted intentionally long with a bit of “blousing”. This ensures it’s easier to get on and off. You can certainly remove some of that length and have it fit tighter through your torso, but just keep in mind it might be more work to wiggle in and out of. If you want a snug fit, you might consider sizing down; if you want something more oversized, try sizing up. The finished garment measurements will help you figure out the ease you’ll be working with. I tried squeezing into a size 10 sample (I’m a size 12 in the bust and waist and a 14 in the hip) and while it looked pretty good (much tighter, and um, sexier), I found the rise a bit long in relation to how tight it was. I’m working on making a tighter version, but I’ll be shortening the rise so it sits closer to my actual crotch, and scooping out the back curve so I still have enough length for my seat. No doubt it will be a bit trickier to get off, but it will be fun to have a slimmer fitting version.
Below you’ll see the Pattern Fit Details for the 14-30 range – the biggest difference between this and the 0-20 is that we added bust and back waist darts for better curvy shaping.

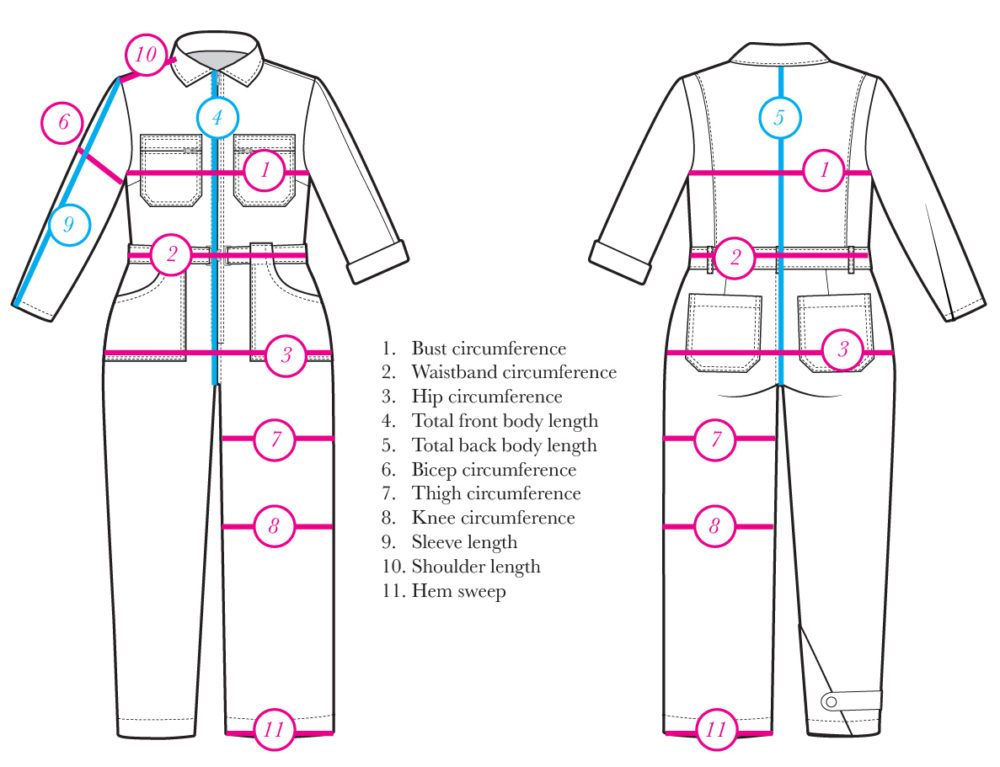
FINISHED GARMENT MEASUREMENTS
We’ve gotten a lot more thorough when it comes to including finished garment measurements with our patterns. For your reference, here is where we are taking those measurements from. Please note that the waist measurement is taken at the waistband, which actually falls about an inch below your natural waist. It might seem like there is a lot of ease there compared to your waist measurement, but where it should sit is a bit wider than your actual waist. Hopefully, this helps if you’re trying to decide what size to make, and whether to size up or down.
HOW TO LENGTHEN AND SHORTEN THIS PATTERN
We’ve included multiple lengthen/shorten lines. These occur at the best spot to make these sorts of adjustments. Depending on your height and/or torso length, you can lengthen or shorten the sleeve, the leg, the rise/crotch and the bodice. Making a muslin will be your best tool for determining if and where those adjustments need to happen. You might find you like the length through the top but want a shorter rise, or vice versa. Every body is different and will need to be adjusted accordingly. I’m going to show an example of lengthening and shortening on the bodice, but the process is the same regardless where you are making the adjustment.
To lengthen, cut the piece across the indicated line and split it evenly the desired amount. Fill in pattern with some scrap paper, and “true” or smooth the lines to connect the two pieces.

To shorten, cut along the indicated line and overlap your pieces, removing the desired amount. True or smooth your new side seams.

HOW TO GRADE BETWEEN SIZES
This pattern isn’t complicated to grade between sizes. Figure out what sizes you’ll need to grade between; in the example below I’m grading between a 16 bust, 18 waist and 20 hip. On the bodice pieces, trace a line connecting the bust (around where the bust notch or dart is) to the waist seam. On the back waistband, no need to grade – just choose the piece that corresponds with your waist size. For the leg, connect your waist size at the top of the leg and draw a curved line to connect to your size at the hip, an inch or so above the hip notch. For the breast pockets, you’ll use the bust size. For back and hip pockets, use your hip size. Depending on how big the grading difference is between waist and hip on the leg, you may need to adjust the hip pocket so it matches the new hip curve.

ADJUSTING THE SHOULDER
Blanca has a dropped shoulder. If you don’t like a dropped shoulder or find it too wide for your frame, taking it in is fairly simple. Simply remove a wedge on front and back shoulder – you aren’t removing that much length from the armscye so I don’t think you’ll need to adjust the sleeve. You can see this adjustment on the left and center drawings below. If you are taking in a substantial amount, you may need to move the back darts/pintuck over as well, since they may end up sitting too close to the arm seam. To do that, trace the notches, dart legs and pintuck line on a piece of tracing paper and shift it over the desired amount. Redraw your lines and you’re good to go!

REMOVING BACK LENGTH
As I’ve mentioned, we drafted a bit of extra length in the back bodice. It creates a slight “blousing” effect in the back, and makes it easier to get on and off. If you’d like remove it, or if you need to do a sway back adjustment, simply shave off the desired amount. Below I’ve joined the new line into the start of the dart, but you could take a bigger wedge across the whole back grading to nothing at the side seam if you need too.

HOW TO FIX A GAPING OR LOOSE WAISTBAND
If you find the back waistband isn’t sitting flat against your body (and taking in the side seams doesn’t help), the easiest, simplest fix is to thread some elastic about the same width of the finished waistband through and pull it to the desired smugness. Baste the elastic in place on the side seams and then finish sewing the garment as directed. Because of all the interconnected parts, I think this is the best solution rather than drafting a more curved waistband like you would do with a pair of jeans.
OTHER ADJUSTMENTS
- We have covered jeans and pants fitting extensively on the blog. Our jeans fitting guide contains all the same adjustments you may need to make for Blanca, so check out that post if you need help with pants fit.
- Large busted? If you fall in both size ranges we recommend making the 14-30 since it has a bit more bust shaping with the bust dart. If you are making the 0-20 range with a large bust, check out our fitting post for Kalle – there are instructions for doing an FBA to a dartless bodice that will help. This post may also help.
- Small busted and making the 14-30 range? Check out our post on small bust adjustments!
That’s about it! Any other fitting questions? I’ll see if I can help in the comments!


