
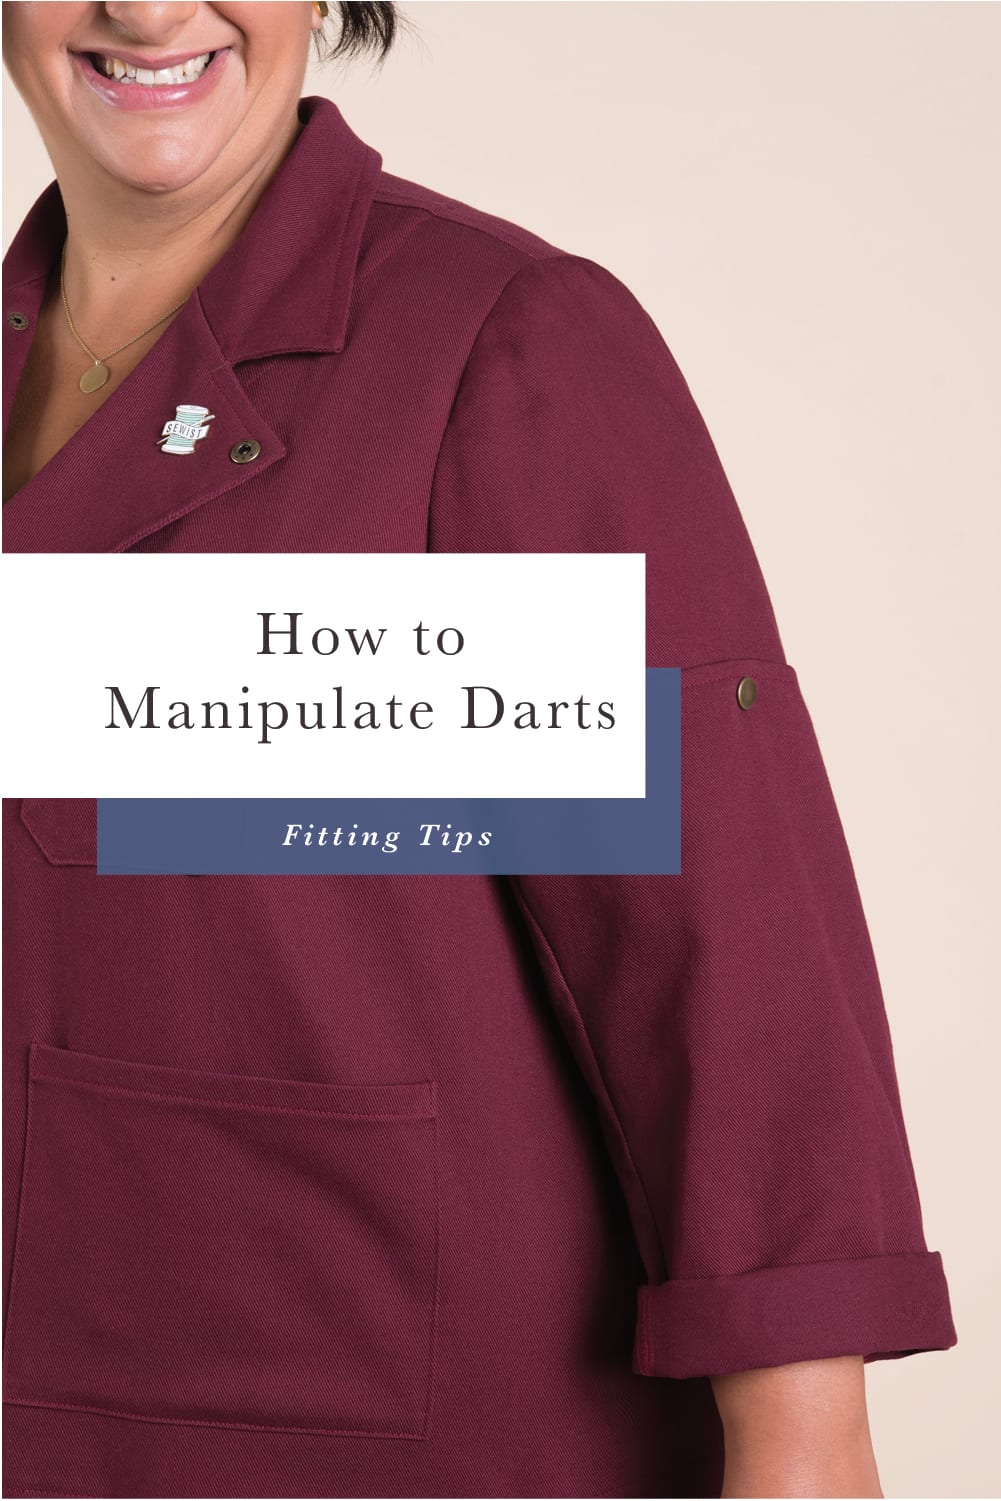
One of the things we’ve started quizzing our pattern testers about in more depth is dart placement. We always want to make sure the location, size and length of any darts we add to our patterns fit the greatest number of people (which is why we had everyone let us know what they thought of the dart we added to the extended sizing for our Sienna Maker Jacket). However, human bodies being the widely varying beauties they are, you may find you need to tweak them for your specific needs. Thankfully, we have a pro on staff to explain all this in greater detail. Our patternmaker Celine is here to help make your darting fitting woes a distant dream! Take it away Celine!
The purpose of a dart (either at the waist or bust) is to allow the fabric to be shaped so the garment is fitted closer to the body. But curves being very variable from one person to another, dart location and length are a mere suggestion based on average sizes and body shapes. The good news is when making you’re making your own garments you can correct darts pretty easily to make them fit your body perfectly. Side note: if you want some help sewing darts, Alexis wrote an AMAZING post on sewing gorgeous darts I encourage you to go check out!
Darts can be moved around as much as you like. Here are a few quick and easy suggestions for dart manipulation using our Sienna Maker Jacket from the extended size range with a bust dart:
HOW TO LENGTHEN OR SHORTEN A DART
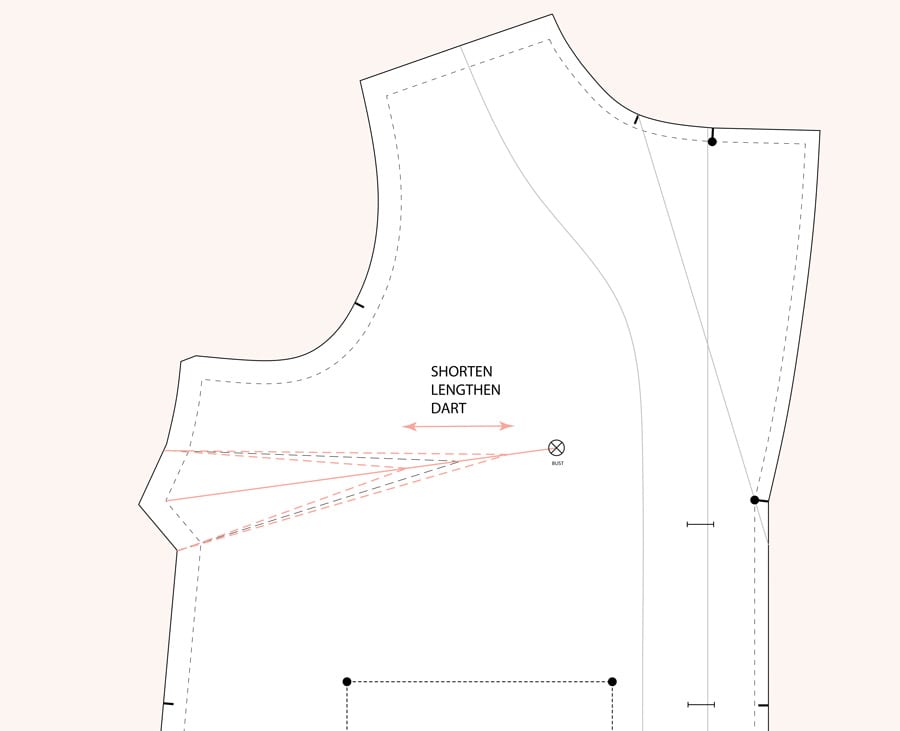
When trying on your muslin, the bust dart may look too long or too short depending of the width and shape of your breast. In general, your dart tip should end about an inch from the apex or fullest point of your bust; this ensures you are adding the volume where you need it. To fix a dart that isn’t ending at the right spot on your body, mark your muslin or pattern with your bust apex. To lengthen or shorten the dart on your pattern piece, trace a line from center of dart to apex, add a point where your dart should end and trace your new dart legs.
MOVE DART UP OR DOWN
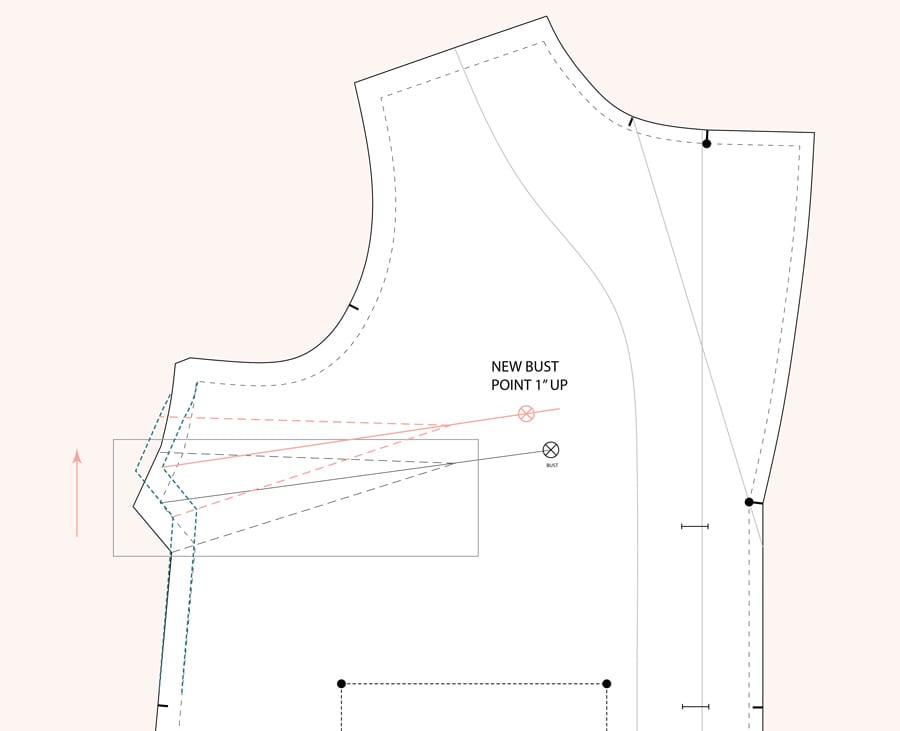
If your bust point is a bit higher or lower than the pattern but you still like how the dart is angled, you can move the dart up or down. Mark the bust point on your muslin and then transfer the new apex location to the pattern piece. Trace a line from center of dart to apex, then on tracing paper, trace the entire dart with seam allowance, dart center line and apex. Move tracing paper up or down until the bust center line reaches the new bust point and trace your new dart.
RE-ANGLE DART TIP
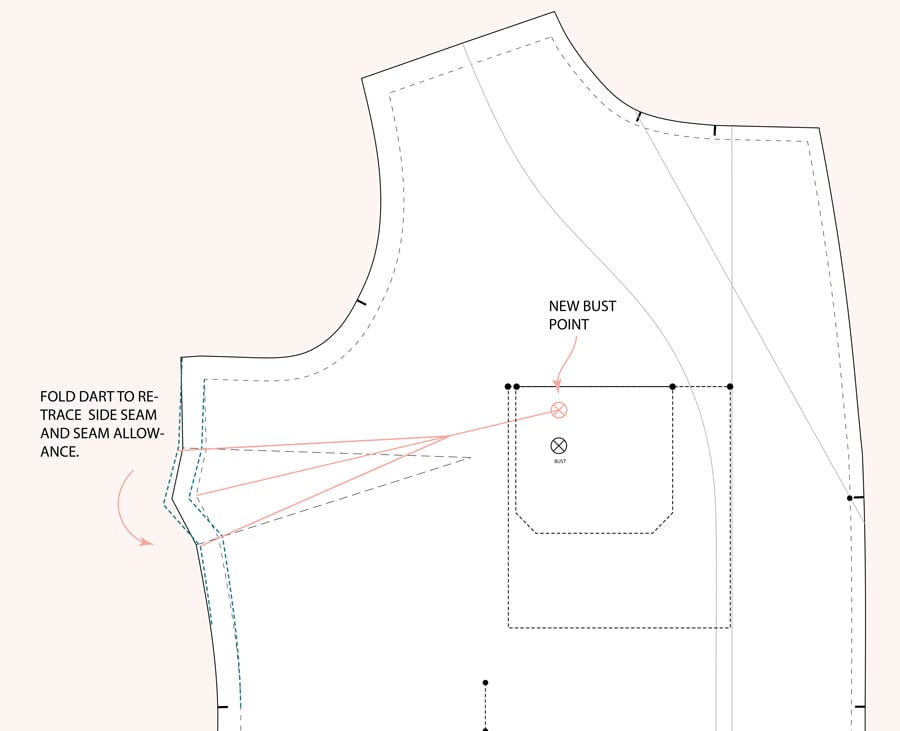
If your bust dart is not pointing toward your bust apex (which is the most common issue with bust darts!) you can easily rotate the dart point so it’s hitting you at the right spot. On your muslin, mark your bust apex. Transfer the new apex location to the pattern piece. Trace a line from center of dart to new apex and trace your new dart legs which should be the same length as on the original pattern. Rotating a dart will change the shape of the dart seam allowance. To retrace it, fold your dart on your pattern piece. The trick is to place you dart tip at the corner of a table and then fold your dart and trace new seam and seam allowance with a tracing wheel.
ROTATE A DART TO A NEW LOCATION
A bust dart can actually be rotated anywhere from waist to neckline depending on how fitted the garment is. For the Sienna Maker Jacket, we originally drafted the bust dart in the armhole because we liked the look, but we ended up rotating that dart into the side seam to make it easier to manipulate without having to touch the armhole for the final pattern. All this to say: you can definitely change darts and move them around depending on your preference. You can also distribute that dart width into one or more darts (fun fact: smaller double darts distribute volume more evenly and are ideal for large busts; in couture they are known as “Dior darts”!)
Here I’m going to show you the fastest way to move your dart to the armhole, shoulder or neckline by slashing and closing.
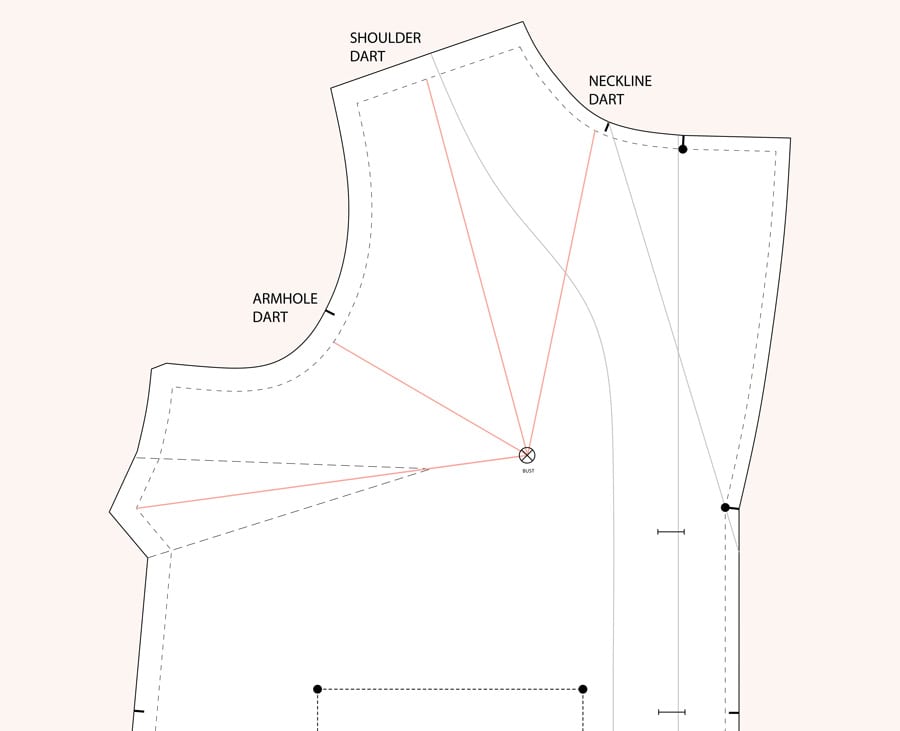
Trace a line from center of dart to apex. Then trace a line where you want your new dart to be. If you’ve made a muslin, you can draw this line on your toile before transferring it to the pattern piece.
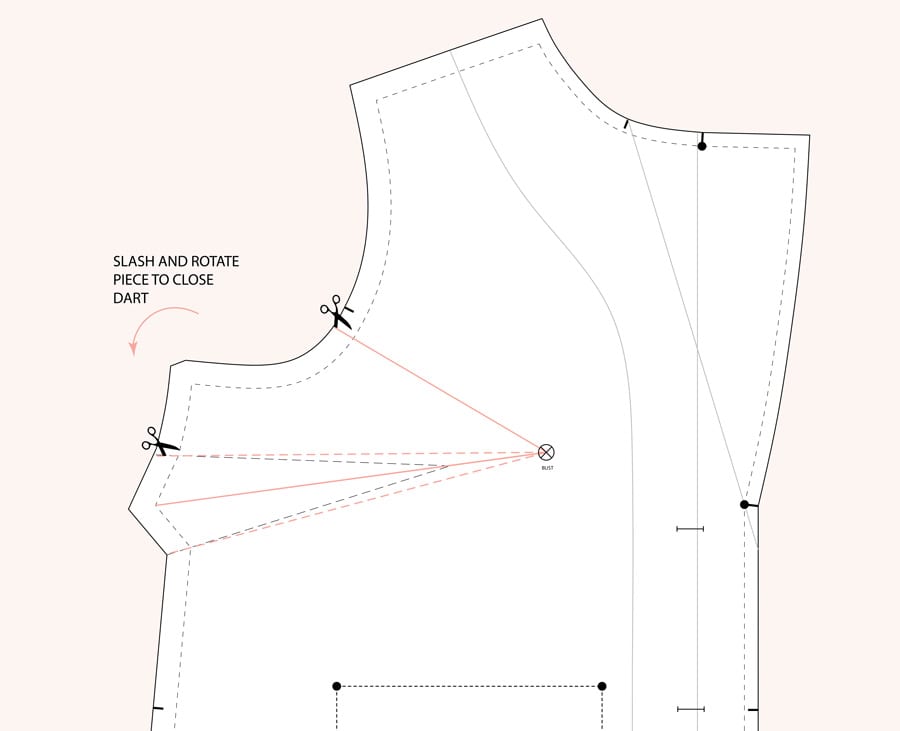
Trace new dart legs from bust point to dart seam allowance. Slash as indicated at the top of the dart and along your new dart location, stopping just before dart point so that the cut-out piece can rotate easily.
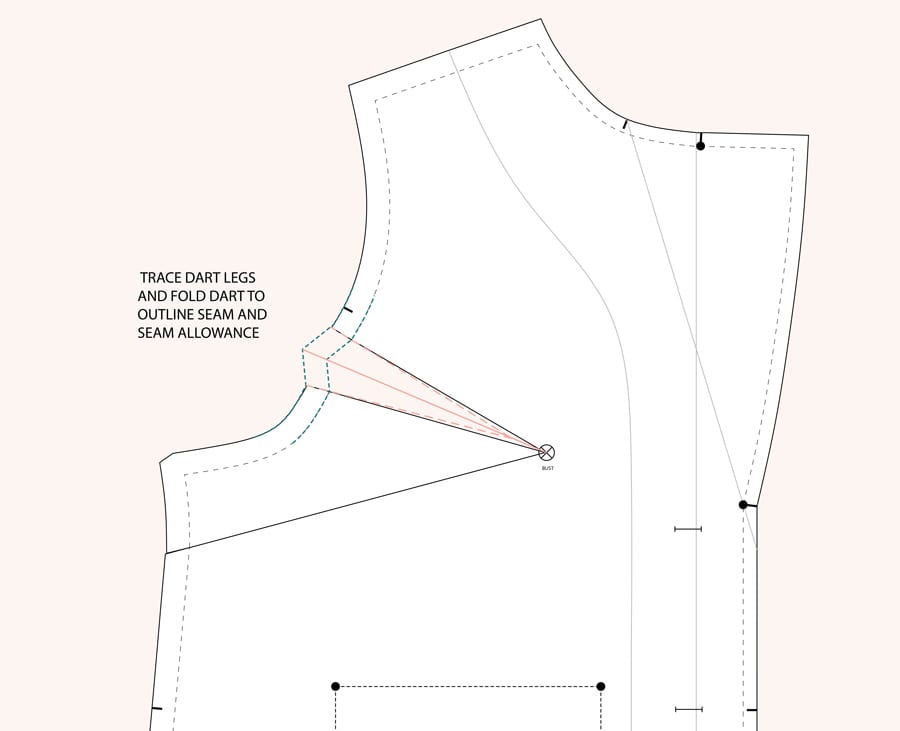
Trace a line at the center of the new dart and then trace dart legs starting approximately 1” from apex (you can adjust the length on you muslin). To retrace the dart seam allowance, fold your dart on your pattern piece as explained earlier.
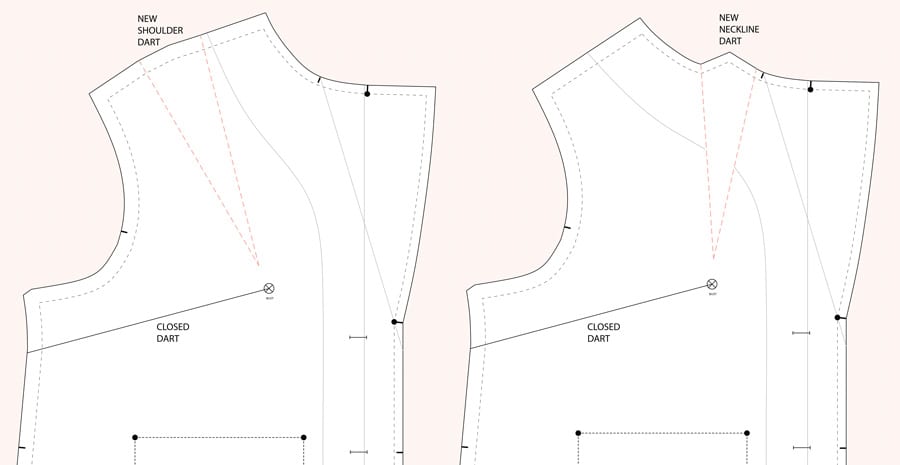
If you’d like a dart at the shoulder or along the neckline, repeat this same slash and close method!
Hopefully, this makes dart fitting a bit easier going forward! And don’t forget to check out our blog post on sewing darts – so many great tricks for getting beautifully finished darts!


